Your coffee is weaker than it used to be. The machine takes longer to finish a brew cycle. There’s an odd gurgling sound halfway through. The fix isn’t a new machine — it’s a 45-minute maintenance task that most coffee drinkers skip entirely: descaling.
Every time your coffee maker heats water, it leaves something behind. Tap water contains dissolved calcium and magnesium minerals, and when those minerals are heated, they crystallise and stick to internal surfaces — the boiler, the heating element, the water lines, the pipes. This build-up is called limescale, and it compounds with every brew. Scale acts as an insulator around the heating element, meaning the machine has to work harder to reach brewing temperature and often can’t. The result is under-extracted, cooler coffee that tastes flat no matter how good the beans are. Left long enough, the heating element burns out entirely. A machine that could have lasted a decade dies in three years simply because it was never descaled.
This guide covers everything: what descaling is, when to do it, which solution to use, step-by-step instructions for every machine type, and the fix for the most common post-descaling frustration — the descale light that won’t turn off. If you’re looking for a new machine rather than maintaining an existing one, see our guide to the best single-serve coffee makers.
Jump To
- Why Descaling Matters
- Descaling vs Cleaning — They’re Not the Same
- 6 Signs Your Machine Needs Descaling
- How Often to Descale
- Vinegar vs Citric Acid vs Commercial Descaler
- How to Descale a Drip Coffee Maker
- How to Descale a Keurig
- How to Descale a Nespresso
- How to Descale an Espresso Machine
- Descale Light Still On? Here’s the Fix
- After Descaling Checklist
- 4 Ways to Slow Scale Build-Up
- Best Descaling Products
- FAQ
Descaling vs Cleaning – They’re Not the Same Thing
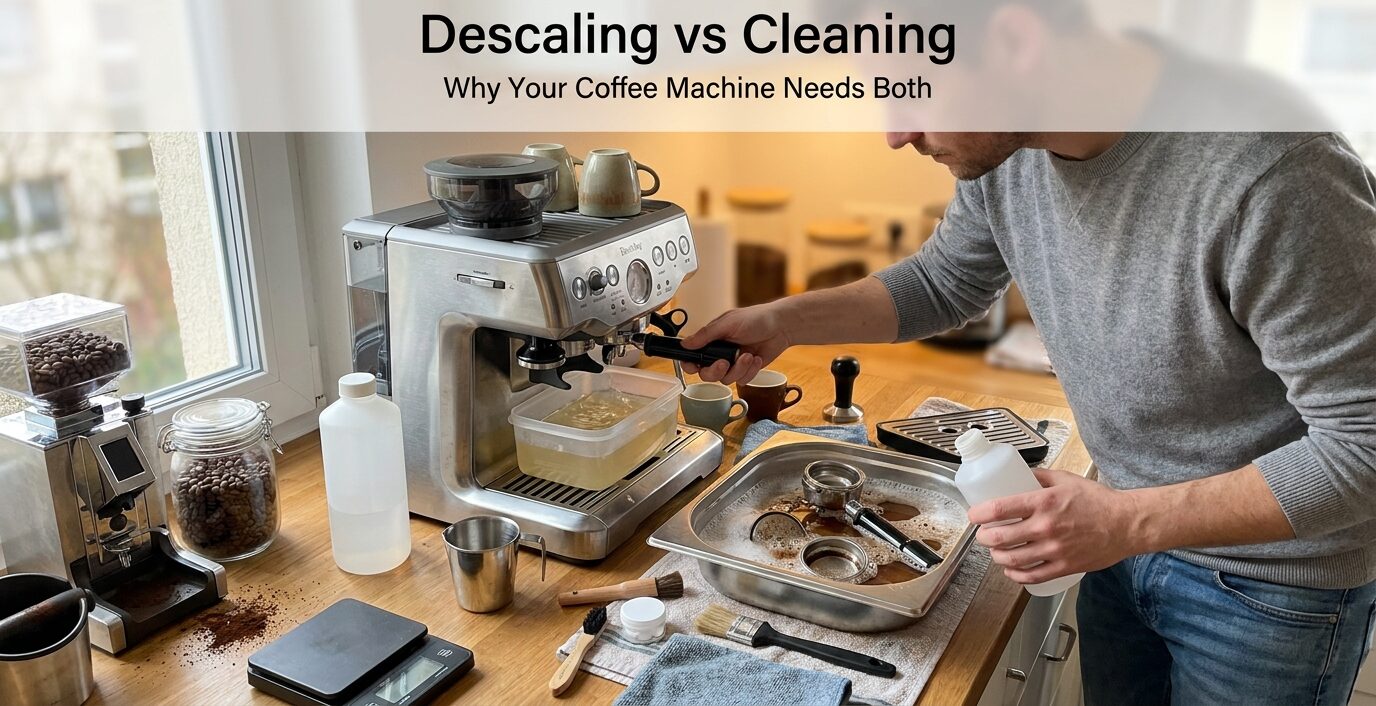
This distinction trips up almost everyone, and it explains why some people descale a machine and still find their coffee tastes stale. Descaling and cleaning target completely different problems with completely different products. You need both, and they are done separately.
| Problem | What It Is | How to Fix It |
|---|---|---|
| Limescale / mineral deposits | Calcium and magnesium from tap water, builds up in the boiler, pipes, and heating element. White, chalky, hard. | Descaling — acid-based solution (citric acid, commercial descaler, vinegar) run through the water circuit |
| Coffee oil residue | Oils and fine coffee particles left in the brew basket, shower screen, portafilter, and carafe. Brown, sticky, rancid over time. | Cleaning — backflushing with water, cleaning tablets (Cafiza), hot soapy water on removable parts |
Descaling treats the water pathway inside the machine — the boiler, thermoblock, internal pipes, and anything water passes through before it reaches your cup. Cleaning treats the coffee pathway — the brew basket, carafe, portafilter, and shower screen where coffee actually contacts the machine.
Running a descaling solution through your machine does not remove coffee oils. Running cleaning tablets through the portafilter does not dissolve limescale from the boiler. They are different chemistry solving different problems. A machine that tastes bitter even after descaling usually needs the coffee pathway cleaned. A machine that brews slowly even after a carafe wash needs descaling. Ideally, do both at the same maintenance session — but know they are separate steps requiring separate products.
6 Signs Your Coffee Maker Is Crying Out for a Descale

You don’t need a descale indicator light to know the time has come. Watch for any of these:
- Slower brew times. If a cycle that used to take 5 minutes now takes 8 or more, scale is restricting the water flow through the internal pipes. The machine is working against itself.
- Weaker, flatter-tasting coffee. Scale insulates the heating element, so water never reaches the 195–205°F sweet spot for proper extraction. Under-hot water produces a thin, dull cup — and no amount of better beans or finer grind will compensate for water that’s 15 degrees too cool.
- Gurgling or sputtering sounds. Unusual noises during the brew cycle — louder than normal, bubbling, or uneven flow — are the sound of water fighting through mineral-clogged passages.
- Coffee not as hot as it used to be. The insulating effect of scale on the heating element directly reduces output temperature. If you find yourself reheating your cup, scale is often the culprit.
- White crust or deposits visible in the reservoir. If scale is visible on internal surfaces, the build-up inside the pipes and boiler where you can’t see is significantly worse. Act immediately.
- The descale indicator light. Modern machines (Keurig, Nespresso, Breville, Ninja, De’Longhi) track brew cycles and alert you when descaling is due. These alerts are calibrated to your specific machine’s scale accumulation rate. Don’t ignore them — and don’t wait for the light if you notice the symptoms above.
One or two of these signs is enough reason to act. The longer you wait, the harder the deposits become and the more rinse cycles you’ll need. Scale left for 12 months or more can permanently damage internal components that no amount of descaling will restore.
How Often Should You Descale a Coffee Maker?
The honest answer: it depends on two things — how hard your tap water is, and how often you brew. The table below gives you a practical starting schedule based on both variables. Use it as a baseline, then adjust based on how your machine behaves.
| Water Hardness | Daily Brewer | Occasional Brewer (a few times a week) |
|---|---|---|
| Very hard (300+ ppm / >17 gpg) | Every 3–4 weeks | Every 6–8 weeks |
| Hard (150–300 ppm / 8–17 gpg) | Every 4–6 weeks | Every 2–3 months |
| Moderate (75–150 ppm / 4–8 gpg) | Every 6–8 weeks | Every 3–4 months |
| Soft (under 75 ppm / under 4 gpg) | Every 2–3 months | Every 4–6 months |
How to find your water hardness: Check your municipal water report — most utilities publish annual water quality reports on their websites and list hardness in ppm or gpg. Alternatively, buy a water hardness test strip kit (available on Amazon for around $8–12). A quick proxy: if your kettle develops white crust within a few weeks of cleaning, or if taps and shower screens scale up fast, you have hard water.
Machine alerts override the calendar. If your machine’s descale light activates before your scheduled date, descale immediately — don’t wait. Conversely, if you’re at your scheduled date but the machine is running perfectly, you can push another two to three weeks before acting.
Vinegar vs Citric Acid vs Commercial Descaler: Which Should You Use?
This is the question most descaling guides dodge. Here’s a direct answer.
| Solution | Effectiveness | Smell / Taste Residue | Seal Safety | Cost per Use | Verdict |
|---|---|---|---|---|---|
| Commercial descaler (Urnex Dezcal, brand-specific) | Excellent | Minimal after rinsing | Best — optimised for coffee machine internals | $1–3 | Best for all machines |
| Citric acid powder (food-grade) | Excellent | None | Very good | ~$0.30–0.50 | Best DIY option |
| White vinegar | Good | Strong — lingers 1–3 days in porous parts | OK for simple drip; risky for espresso and pod machines long-term | Effectively free | Last resort only |
| Baking soda | Poor (alkaline, not acidic) | None | Good | Free | Deodoriser only — not a descaler |
| Lemon juice | Fair | Light citrus | Good | Low | Works, but citric acid powder is cheaper and more effective |
Commercial Descaler — The Right Tool for the Job
Commercial coffee descalers are typically built around citric acid, lactic acid, sulfamic acid, or a blend of these. They dissolve mineral scale faster than vinegar, leave near-zero odour or taste residue after proper rinsing, and are formulated to be gentle on rubber seals, plastic internals, and aluminium boiler components. They also come with machine-specific dilution ratios and instructions already worked out. The most widely trusted option for home machines is Urnex Dezcal — citric acid base, available in powder packets and tablets, safe for drip, espresso, Keurig, and Nespresso machines alike.

Check Urnex Dezcal price on Amazon →
If your machine is under warranty, use the manufacturer’s own branded descaler. Keurig, Nespresso, Breville, De’Longhi, and Ninja all sell their own — and all specifically require it (or an approved alternative) to maintain warranty coverage.
Citric Acid Powder – Best DIY Option
Food-grade citric acid is the same core chemistry as most commercial descalers, without the brand markup. It’s odourless, biodegradable, food-safe, and costs roughly $8–10 for a 1 lb bag that provides 20–30 descaling sessions. Dissolve 1–2 tablespoons per litre of warm water and use exactly as you would a commercial descaler. Zero smell, zero taste residue after two rinse cycles. Safe for rubber seals at the recommended dilution. If you’re descaling a machine out of warranty and don’t have a commercial descaler to hand, citric acid is the correct default choice.
White Vinegar – Last Resort Only
Vinegar works — acetic acid dissolves calcium and magnesium deposits. But it does the job more slowly than citric acid, and its smell leaches into porous machine components and can linger for one to three days and several rinse cycles. For simple drip coffee makers, this is a manageable inconvenience. For espresso machines, pod machines, and anything with rubber seals under pressure, vinegar’s acidity can cause cumulative damage to seals over time if used repeatedly.
More critically: Keurig, Nespresso, and De’Longhi warranties explicitly prohibit vinegar use. If you use vinegar on a machine that’s still under warranty and later claim a repair, the claim may be denied. Check your machine’s manual before reaching for the vinegar bottle.
Use vinegar only on basic drip machines, only diluted 1:1 with water, and only when you have nothing else available.
How to Descale a Drip Coffee Maker
Covers: Mr. Coffee, Cuisinart, Hamilton Beach, Ninja Brew, Bonavita, Technivorm, OXO, and all standard auto-drip machines.

What you need: Descaling solution, citric acid, or white vinegar · Fresh water · Large mug or carafe · 45–60 minutes
- Empty and prep. Discard any coffee grounds and remove the paper or reusable filter from the brew basket. Empty and rinse the carafe. If the machine has a removable water filter cartridge, take it out — running descaler through the filter damages it.
- Mix and fill. Add your descaling solution directly to the water reservoir: one commercial descaler sachet per packet instructions; or 1–2 tablespoons of citric acid powder dissolved per litre of water; or a 1:1 mixture of white vinegar and water. Fill to the reservoir’s maximum line.
- Start a brew cycle. Place the carafe or a large container under the brew head and begin a normal brew cycle. Let the machine run until the reservoir is roughly half empty, then pause the cycle.
- Soak for 20–30 minutes. This is the most skipped step and the most important one. Letting the solution sit in the heating element and internal pipes gives the acid time to dissolve hardened mineral deposits rather than simply flowing past them. Set a timer.
- Complete the cycle. After the soak, resume and finish the brew. Discard the solution in the carafe.
- Rinse — twice. Fill the reservoir with fresh cold water to the maximum line and run a complete brew cycle. Discard. Repeat at least once more. If you used vinegar, run three rinse cycles and smell the output after the last one — if you can still detect vinegar, run another cycle.
- Reinstall the filter. Put the water filter cartridge back in the reservoir. The machine is ready to brew.
Total active time: About 10 minutes. Total elapsed time: 45–60 minutes including the soak.
How to Descale a Keurig
Covers: K-Mini, K-Classic, K-Elite, K-Supreme, K-Supreme Plus, K-Duo, K-Slim, K-Express, and all Keurig K-Cup models.
Important before you start: Keurig officially recommends using Keurig Descaling Solution. Vinegar is not recommended by Keurig and may void the warranty on newer models. Use Keurig’s own solution or food-grade citric acid (1.5 tablespoons per 500ml of water) as an approved alternative.
- Power off and empty. Turn the machine off and remove the water reservoir. Discard any water and remove the water filter cartridge if present.
- Mix and fill. Pour the full bottle of Keurig Descaling Solution into the reservoir. Add the same volume of fresh water (approximately 500ml total, or follow the packet). Alternatively, dissolve 1.5 tablespoons of citric acid powder in 500ml of warm water and pour into the reservoir.
- Power on and place a large mug. Turn the machine on. Place a large mug (at least 12 oz) on the drip tray — do not insert a K-Cup.
- Run brew cycles without a pod. Select the largest available brew size and begin a cycle with no K-Cup pod inserted. The machine dispenses the descaling solution through the internal water circuit. Discard the contents of the mug after each cycle.
- Repeat until the ADD WATER light activates. Keep running cycles until the machine indicates the reservoir is empty. Then let the machine sit powered on but idle for 30 minutes. This rest period allows the descaling solution to work on hardened deposits in the heating element.
- Rinse — 12 times. Remove the reservoir, rinse it thoroughly, and fill with fresh water to the MAX line. Run brew cycles (no pod, largest size) and discard. Keurig specifically recommends completing at least 12 rinse brews to ensure all descaling solution residue is cleared from the internal water circuit.
- Reinstall the water filter. Once rinsing is complete, reinstall the filter cartridge. The machine is ready to brew.
Descale light still on after all of this? See the fix below — Keurig models require a specific reset sequence that is separate from the descaling process itself.
How to Descale a Nespresso Machine
Covers: Vertuo series (VertuoPlus, VertuoNext, VertuoPop), Original series (Essenza Mini, Pixie, Citiz, Inissia).
Important before you start: Nespresso’s warranty explicitly prohibits vinegar. Use only the official Nespresso Descaling Kit or food-grade citric acid (1 tablespoon per 500ml water) on out-of-warranty machines.
Nespresso machines run a fully automated descaling programme — once activated, the machine handles the cycle without you needing to pause or monitor it. The main challenge is entering descaling mode, which varies slightly by model.
- Prepare the machine. Empty the capsule container and drip tray. Remove any capsule from the machine. Fill the water tank with 500ml of fresh water and dissolve the contents of one Nespresso descaling sachet (or 1 tablespoon of citric acid). Stir gently.
- Enter descaling mode.
- VertuoPlus / VertuoNext: With the machine on, open the head to unlock position. Hold the button for 7 seconds until the light blinks orange three times to confirm descaling mode.
- Original series (Pixie, Citiz, Essenza Mini): With both buttons held simultaneously for 3 seconds, the machine enters descaling mode (lights blink rapidly). Refer to your specific model’s manual for the exact combination.
- Place a container and start. Put a container of at least 1 litre capacity under the spout. Press the button to begin the descaling programme. The machine runs the full cycle automatically, alternating between dispensing and pausing.
- Rinse cycle. When the first cycle ends, the machine will prompt you to refill with clean water. Empty and rinse the tank, then fill with 500ml of fresh water. Press the button again to run the rinse cycle automatically.
- Reset and rest. When the programme completes, the machine exits descaling mode automatically and returns to normal operation. Allow 10 minutes before brewing your first capsule.
Note: If the descaling programme is interrupted (power loss, door opened, etc.), the machine may not register the cycle as complete and the descale light will remain on. Re-enter descaling mode and complete the full automated cycle from the beginning.
How to Descale an Espresso Machine
Covers: Breville Barista Express, Breville Barista Pro, De’Longhi La Specialista, Gaggia Classic, Ninja Luxe Café Premier, Sage, and most semi-automatic home espresso machines.
Critical distinction: Descaling an espresso machine clears the water circuit (boiler, thermoblock, water lines). Backflushing clears the coffee circuit (grouphead, solenoid valve). Both are necessary; they are done separately with different products. This guide covers descaling only.
Solution warning: Espresso machines with aluminium boiler components can be damaged by white vinegar over repeated use. Always use a commercial espresso descaler (Urnex Dezcal, manufacturer’s own solution) or food-grade citric acid. Check your machine’s manual — Breville, De’Longhi, and Ninja all specify approved solutions in their warranty terms.
- Prepare the machine. Empty the drip tray. Remove the portafilter and any basket. If the water reservoir has a filter cartridge, remove it. Fill the reservoir with descaling solution per your machine brand’s instructions — typically one sachet dissolved in a full reservoir of water.
- Activate descaling mode. Most modern espresso machines (Breville, De’Longhi, Ninja) have a dedicated descaling cycle accessible from the control panel or display. Enter this mode — the machine will guide you through the process automatically, directing solution through the grouphead and steam circuit in sequence.
- Ninja Luxe Café Premier: the touchscreen guides you through the descaling cycle automatically when prompted.
- Breville Barista Express: hold the 1-cup and 2-cup buttons simultaneously for 3 seconds to enter cleaning cycle mode; follow the button prompts.
- De’Longhi: varies by model — most use a dedicated descale button or a button combination held for 5 seconds.
- Run the guided cycle. On machines with automated descaling, the cycle runs approximately 20–30 minutes and directs the solution through all internal water circuits. Keep a container under the grouphead and steam wand throughout. Do not use the machine for anything else during this cycle.
- Manual approach (machines without a descale mode): Run the descaling solution through the grouphead in short 30-second bursts with 30-second pauses, alternating between the grouphead and the steam wand. Repeat until the reservoir empties.
- Rinse cycle. Refill the reservoir with fresh water and run the rinse programme (usually the same button sequence again). On machines without an automated rinse, run two full reservoir-loads of clean water through the grouphead and steam wand alternately.
- Manual rinse. After the automated rinse, run one portafilter-load of clean water through the grouphead manually and purge the steam wand for 15 seconds. Discard both.
- Allow the boiler to stabilise. Wait 10 minutes before pulling your first shot to allow the thermoblock or boiler to reach stable operating temperature after the cool rinse water.
For a full review of an espresso machine with a built-in guided descaling cycle, see our Ninja Luxe Café Premier review.
Descale Light Still On? Here’s the Fix
You’ve finished the descaling process. You’ve run the rinse cycles. The indicator light is still blinking. This is the most common frustration after descaling — and nearly every guide fails to address it properly. Here’s why it happens and how to fix it.
Most machines do not automatically sense that descaling is complete. The indicator is driven by a brew-cycle counter that accumulates over time. Completing the physical descaling process does not automatically reset the counter — a separate manual reset sequence is required on many models.
Keurig Descale Light Reset
- K-Mini, K-Classic: Power cycle the machine. Unplug for 60 seconds, then plug back in. This clears the indicator on most basic Keurig models.
- K-Elite: With the machine powered on, simultaneously hold the 8oz and 12oz buttons for 3 seconds. The descale light should turn off.
- K-Supreme / K-Supreme Plus: Hold the 8oz and 12oz buttons simultaneously for 3 seconds. If the light persists, make sure you completed the full 12 rinse cycles — incomplete rinsing prevents the counter from resetting on these models.
- K-Duo: Hold the Strong and 12oz buttons simultaneously for 3 seconds.
Note: If you descaled with vinegar instead of Keurig’s own solution, the machine’s cycle counter does not differentiate between solutions. The reset sequence must still be completed manually regardless of what you used to descale.
Nespresso Descale Light Reset
Nespresso machines reset the descale indicator automatically at the end of the guided descaling programme. If the light remains on, it almost always means the programme was interrupted before completion. Re-enter descaling mode and run the full cycle from the beginning — don’t open the machine or interrupt the process until the programme ends and the machine exits descaling mode on its own.
Breville / Ninja / De‘Longhi
On most Breville, Ninja, and De’Longhi machines, the descale alert clears automatically when the machine’s guided descaling cycle completes. If the alert persists after a full guided cycle, run one additional clean water rinse cycle through the guided mode — this usually resolves it. If it still shows, consult the machine’s manual for the specific reset button combination for your model.
After Descaling: A Quick Checklist
- Run at least 2 fresh water rinse cycles before brewing coffee — 3 if you used vinegar
- Reinstall the water filter cartridge if you removed it
- Wipe down the drip tray, reservoir exterior, and machine body with a damp cloth
- Pull a blank water-only brew to confirm normal brew speed has returned
- Note today’s date and set a calendar reminder for your next descale based on the frequency table above
- Take 5 minutes to clean the brew basket, carafe, or portafilter with warm soapy water — a different task, but worth pairing with descaling while you’re already in maintenance mode
4 Ways to Slow Scale Build-Up and Descale Less Often
You can’t eliminate scale entirely — it’s a chemistry consequence of heating mineral-containing water. But you can meaningfully slow the accumulation rate with four practical habits.
- Use filtered water. A basic pitcher filter (Brita, PUR, or similar) reduces the dissolved mineral content of tap water significantly. It won’t bring hard water to zero, but it can extend your descaling interval by weeks. In a very hard water area, this single change can move you from monthly descaling to every 6–8 weeks. The filters cost a few dollars each and last a month or more.
- Use and replace your machine’s built-in water filter. Most Keurig, Breville, and De’Longhi machines include a filter cartridge in the reservoir that reduces both chlorine and mineral content. Replace it on the manufacturer’s schedule — typically every 2 months or every 60 tank fills. A clogged filter that’s past its service life stops working and may start releasing what it previously absorbed.
- Empty the reservoir when not in use. Stagnant water sitting in the tank evaporates slowly, concentrating the remaining minerals. If you don’t brew every day, empty the reservoir between uses. This is especially important for machines that sit unused for a week or more.
- Don’t ignore the descale alert. Acting within a week of the alert, rather than months later, keeps deposits manageable. Fresh, lighter scale dissolves easily in one descaling session. Hardened scale that’s been building for six months may need a second or third descaling cycle to fully clear, and in severe cases may cause permanent damage to internal components.
Best Descaling Products for Coffee Makers
If you need to buy a descaler, these are the options worth using. All are available on Amazon with Prime shipping.
1. Urnex Dezcal — Best for All Machines
Citric acid base, low odour, effective on heavy calcium build-up, and compatible with virtually every home coffee machine type — drip, espresso, Keurig, and Nespresso. Available in both powder sachets (measure yourself) and pre-measured dissolvable tablets. Widely used in professional café settings as well as home kitchens. One packet per descaling session.
Check Urnex Dezcal on Amazon →
2. Food-Grade Citric Acid Powder — Best Value DIY Option

Odourless, food-safe, biodegradable, and as effective as any commercial descaler at the correct dilution. A 1 lb bag costs $8–10 and provides approximately 20–30 descaling sessions. Use 1–2 tablespoons per litre of warm water. Store in a sealed container between uses. Available widely on Amazon — search “food grade citric acid powder” and look for a well-reviewed 1 lb bag from a reputable supplier.
3. Brand-Specific Descalers — Best When Under Warranty

If your machine is still within its manufacturer warranty period, use the brand’s own descaling solution to avoid any warranty disputes. Keurig, Nespresso, Breville, De’Longhi, and Ninja all sell their own descaling kits. Search the brand name + “descaling solution” on Amazon for the current listing.
Descaling a Coffee Maker — Frequently Asked Questions
Will descaling improve my coffee taste?
Often dramatically, yes — especially if the machine is overdue. Scale insulates the heating element and prevents water from reaching the 195–205°F range required for proper extraction. Under-temperature water produces a weak, flat, under-extracted cup. No amount of better beans, finer grind, or longer bloom can compensate for water that’s 15 degrees too cool. Restore proper temperature by removing the scale, and you restore proper extraction. Most people notice an immediate and significant improvement in coffee strength and flavour.
Can I use apple cider vinegar instead of white vinegar to descale?
Technically yes — apple cider vinegar contains acetic acid and will dissolve mineral scale. In practice, don’t. It’s more expensive than white vinegar, smells worse, and the flavour residue is even harder to rinse out. If you want a DIY option, food-grade citric acid powder is cheaper, odourless, and significantly more effective. Reserve apple cider vinegar for salad dressing.
Can I descale too often?
With commercial descaler or citric acid at the recommended dilution: no. More frequent descaling than necessary is wasteful but harmless. With vinegar at full concentration used very frequently (weekly), there is a theoretical risk of degrading rubber seals over many years. Follow the frequency table above and you’re fine with any solution at any recommended schedule.
Is descaling safe if my machine has a water filter?
Remove the water filter cartridge before descaling. Descaling solution damages the filter’s filtration medium and reduces its effectiveness. You’ll waste the filtration capacity and potentially release what the filter has already absorbed back into your water. Reinstall the filter cartridge after all rinse cycles are complete.
Does descaling void the warranty?
It depends entirely on which solution you use. Most manufacturers require their own branded descaler or an approved equivalent to maintain warranty coverage. Keurig, Nespresso, and De’Longhi all specify this in their warranty documentation. Using vinegar on a machine that explicitly prohibits it, then making a warranty repair claim, may result in a denied claim. Always check the manual before choosing a solution on a machine still within its warranty period.
Can I descale a coffee maker with baking soda?
No — not effectively. Baking soda is alkaline (pH around 8.3), not acidic. Mineral scale is also alkaline, so baking soda has little to no chemical effect on it. You can use baking soda to deodorise the carafe or water reservoir by dissolving it in warm water and soaking, but it won’t clear limescale from internal components. Use an acid (citric acid or commercial descaler) for actual descaling.
What’s the difference between descaling and cleaning a coffee maker?
Descaling removes mineral deposits (limescale) from the water circuit — boiler, pipes, heating element. It uses acidic solutions. Cleaning removes coffee oil residue and fine grounds from the coffee circuit — brew basket, carafe, portafilter, shower screen. It uses cleaning tablets (like Cafiza) or warm soapy water. A machine can need both simultaneously, and treating one does not treat the other. See the full explanation in Section 2 above.
Keep Your Coffee Game Strong
A descaled machine is the foundation of good coffee. Now that yours is running at full efficiency, the other variables — beans, grind, water temperature, and brew ratio — can actually do their jobs. If you’re thinking about upgrading your equipment, here’s where to go next on RoastRig:
- Best Single-Serve Coffee Makers — our top picks at every budget
- Best Iced Coffee Makers — dedicated cold brew and flash-chill options
- Ninja Luxe Café Premier Review — the best beginner espresso machine under $550
- Horavie Hot & Iced Single Serve Review — compact hot and iced coffee for under $45
- Best Gooseneck Kettles — if you’re adding pour-over to your rotation